Showing posts with label glitter polish. Show all posts

Friday, June 15, 2012

Barbie Pink!

Hey guys!

This past weekend, my boyfriend and I had a wedding to go to so of course once I decided on what dress I was wearing, I had to figure out what to do with my nails! I waned something girly and pretty and simple. As I was looking through my polish I found Play the Peonies from OPI but I wanted more that just that beautiful light pearly pink so I went looking in my glitters to see if I could find anything that would go well. I found a glittery pink top coat from Forever21.

It turned out perfect! It changed Play the Peonies just enough (click here to see Play the Peonies by itself). As you can see, the top coat really did change the color and the glitter was just enough. I really liked how it turned out, hope you guys did too!
Lindsey

Tuesday, August 30, 2011

Fun With Cracks

Hi bloggers!

As I've stated before, I love glitter polishes and I love crackle polishes and the two together is just wonderful but as more and more companies are coming out with crackle/shatter polishes and more and more people are using it, just having a crackle top coat is getting a little boring so I decided to spice it up a bit.

The base coat I used was Sparkle Teal Sunrise by OPI, a absolute beautiful glitter!

Next instead of just covering my whole nail with the crackle polish, I tapped off parts of my nails so I tapped them of diagonally with Fractured Foil Crackle Overcoat by Sally Hansen. I also used Lightning Bolt Crackle by China Glaze on my ring fingers that I tapped off down the middle, so my ring fingers had two different crackles going in two different directions. I wasn't crazy about the color combination once it was on my nails but I think with the right colors it would have turned out a lot better!

Hope you enjoyed!
-Lindsey

Wednesday, August 24, 2011

How To: Glitter Gradients are Spark-tacular!

Hi lacquer lovers!

Today's post is going to be all about creating a glitter gradient. I know I've seen multiple tutorials on how to create them, so if you've seen them as well, sorry, here's another one but for the ones of you who haven't take a good look!

Things you will need:
  • Q-tips or cosmetic sponge (I use Q-tips, I think they're easier and cheaper)
  • Glitter nail polish (kind of obvious lol) and a regular polish if you want a base coat color
  • water
  • patience
 First step is to start with your base coat color. You don't have to do a base color if you don't want to but I find the glitter stands out more if you do, especially depending on the combination of base color and glitter color you use. The color I used was Time-less is More from OPI which is a shear white color that would be great for doing french manicures.

After your base coat is completely dry, on to the glitter! Take your Q-tip and get the tip of it wet but not dripping wet. If the Q-tip is wet then the glitter won't stick to it as much and will transfer for your nail nicely.

Once your Q-tip is wet, open your bottle of glitter and put some polish on to the tip then start to apply to your nail. I start at the very tip of my nail and pat downward toward the cuticle and keep repeating this process until you get the effect that you like. I used Sephora by OPI's Spark-takular! 

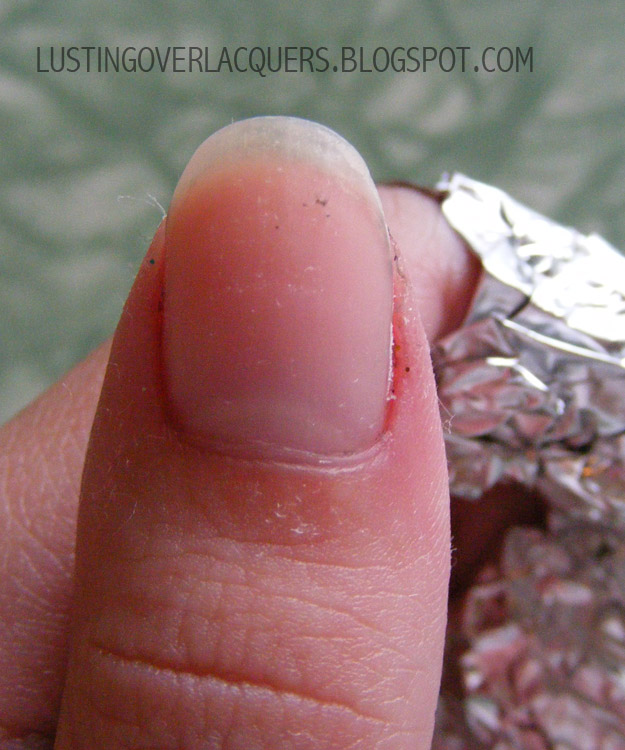
The last step, as always is a good clear top coat! And a great way to remove this mani once you're ready to switch it up, would be to use the foil method which I posted about not too long ago :)

I hope this was helpful to those of you who were wanting to learn!
-Lindsey

PS- this is my birthday manicure!! :) 

Monday, August 22, 2011

Girly Pink Glitter

Hi bloggers!

Alright, getting back on track with posting things regularly starts now!

Here is another polish from Forever21's Love & Beauty line that has no name. I grabbed it because it reminded me of Katy Perry's Teenage Dream but sadly, it isn't as glittery or as girly in my opinion as Teenage Dream is but it is still pretty and still very girly. And once again, super cute bottle!! To get this as glittery and girly as I wanted, I would have had to have done at least 3 coats, this is only with 2 coats. 

Just a quick one to ease back into things but we'll be posting more this week!
-Lindsey

Tuesday, August 2, 2011

My First Franken: Glittering Pearls

Hi bloggers!

A while ago I posted about making my own franken polishes and here is my first one! For this one, I used a bottle of Wet N Wild clear nail polish and mixed in four different kinds of Nyx eye shadow pigments. The colors from left to right are: Glitter Mania in Crystal, Ultra Pearl Mania in Fanta Pearl, Ultra Pearl Mania in Mink Pearl, and Ultra Pearl Mania in Lilac Pearl.

I tried to keep an equal amount of the colored pigments in the mix but the Fanta Pearl color seemed to be more pigmented than the others so I put less of it in the mixture. It is kind of sheer but I still really like how it turned out! I plan on making each of the colored pigments into their own polish, not sure but we'll see.

Be on the look out for more and more frankens from me!!
-Lindsey

Tuesday, July 26, 2011

Elegant Party Nails

Hi bloggers!


As I've stated many times before, I LOVE accent nails!! This is certain accent nail is an easy way to add a little flare to your nails for any special occasion or just for the hell of it! I started off with Play in the Peonies by OPI, which Brielle raved about to me and I'm surprised she hasn't posted about it yet. I love it equally as much as she does! Soo pretty, it's the perfect "baby pink" in my eyes.
Now on to the accent nail. Along with glitter and accent nails, I LOVE LOVE LOVE gradient glitter nails. They are my go-to party nail look. I used three different colors to create this look on my ring fingers, from left to right: Covered in Diamonds from Studio M, Sparked from Wet N Wild, and I Miss You from Sinful Colors.

 I use a wet Q-tip to create my gradients but you can also use cosmetic sponges to do so as well. Once again, glitter + accent nail + glitter gradient = one happy girl with pretty nails :) Hope you liked them! 


-Lindsey

Thursday, July 21, 2011

Mermaid Tail

Hi bloggers,


I tried out a new Love & Beauty polish from Forever21 today and I had kind high hopes for it and feel a little let down by it. Let me show you why and explain...


I do love the flakes in this polish but by itself, I feel like it made my nails look like they just had a green tinge to them, not that they were painted and who wants green nails? Not me! This polish would look really good over greens, blues, possibly yellows, and possibly purples though! So in order to try and save this, I put another new polish from Love & Beauty on top of it and really liked how it 
came out. 


Even more flakes and glitter added on top! I thought it looked kind of like a mermaid tail. I'm really glad I tried out these two polished together! 
On a side note, I thought the flower bottle was so stinking cute!! I also got a pink one too that I'm excited to try out! 

"If at first you don't succeed, try, try again" totally worked in this situation!
-Lindsey

Saturday, July 16, 2011

Glittergasm Removal

Hi bloggers!


Have you ever tried to remove your glitter polish and gone through multiple cotton balls on one nail and still not had a clean, bare nail? We have!! Here is an easy way to get your favorite glitter polishes off without scrubbing your nails to death. 


Things you'll need:
Nail polish remover, aluminum foil, and cotton balls (I tear these squares in half so I don't use so many) You'll need foil and cotton balls or pads for each nail. 

First,  soak your cotton ball or pad and place it on your nail. 
Next, wrap the foil around your whole nail. Make sure to press it tightly around your nail so the polish remover can really soak into the polish. 
Now that you look like you're trying to become the Tin Man, wait five to ten minutes depending upon how glitter is on your nails. 
Tip: I've found that it is easier to do one hand at a time because when you start on your second hand, you've already got all the foil on the other so it makes it harder to do things. Once the time has passed, give it a little scrub and pull off the foil to reveal a bare nail! 
If you didn't leave the foil and remover on long enough, obviously there will still be some polish on your nails but this really is a life saver when it comes to glitter polish!! 

Hope everyone's weekend is going well, mine sure is! 
-Lindsey


Thursday, July 14, 2011

Glittergasm

Hi bloggers!

Incase you couldn't guess from the title, there is a complete and total glittlergasm on my nails and I LOVE IT! I started off with a black base, China Glaze Liquid Leather, to make the glitter really stand out.
Next, I wanted to try out a polish I hadn't gotten to try yet, Wet N Wild Party of Five Glitters. I was a little disappointed with this because there just wasn't enough glitter for my liking. For this to be how I wanted, I would have to put on a TON of layers. 
And for the glittergasm, Sephora by OPI Spark-tacular!

I absolutely LOVE, LOVE, LOVE this polish....and not only is it amazing but it also is a pretty close dupe for Deborah Lippmann's Happy Birthday which I've been wanting for a while now. If you love glitter polish, this is a must buy. 

Hope you enjoyed as much as I did! 
-Lindsey

Tuesday, July 12, 2011

Sephora by OPI Looks Like Rain, Dear

Hey everyone! (Does anyone else feel weird saying Hello, everyone? haha, I do.)

Some of my favorite summer nail polishes are technically from winter collections! Ha! Out fooled you, Mother Nature!

Anyone will tell you that I love my nudes and glitters. Well, since we've went through all the nudes I had for my Bridal Series, on to glitters!

This is Sephora by OPI's Looks Like Rain, Dear. It's a glorious golden glitter. I love love love wearing this color in the summertime, it just looks so wonderful in the sunlight!

See for yourselves:

See how the light reflects off the glitter?


SO GORGEOUS! It just looks so pretty (even more if you had a tan, which I obviously do not.) 

(By the way, this polish is TERRIBLE to take off. I use felt instead of a cotton ball and it works sooo much better, especially since I HATE the sound of stretching cotton.)

See you next time!
Brielle

Wednesday, July 6, 2011

Cinderella Nails!

Hi bloggers!

I wanted to do something different with my nails today, so I decided to match up American Apparel's Echo Park which is just a creme-y grey (if you haven't tried out American Apparel nail polishes, they are to die for) with OPI's Last Friday Night from the Katy Perry collection. I die for glitters, as anyone knows, so this was totally up my alley!

This combination was totally on a whim and it was so awesome when it was done and it reminded me of a color that would be in Cinderella. It reminded me of her dress at the end, a kind of muted blue. SO GORG!  This is one of my favorite color combinations i've ever done. So in love.

Here they are! Cinderella Nails!


My nails are finally long enough to start shaping again. I'm having trouble finding the best way to get a straight across look. Whenever I file, it either is crooked, indented or not straight! Any tips on how I can get my tips to look symmetrical? I would love to know secrets!

Loveeeee you all! I might try Echo Park with OPI's I Lilly Love You next, it makes me think, Aurora Nails! We'll see! 

Brielle 

Saturday, July 2, 2011

Semi-inspired 4th of July nails

Hi bloggers!


I did this manicure not thinking about it being a 4th of July look but it kind of turned out that way. I started out with a Love & Beauty polish with super chunky glitter. 
I had planned on only using this glitter but to get as much glitter as I wanted, I would have had to do at least five coats and I just didn't want to take the time to do that so I grabbed a finer glitter polish called Kaleidoscope from Wet N Wild. 
Finally on top of that, I added a crackle. Sally Hansen's Cherry Smash Crackle Overcoat. 

I really liked how this turned out but it was a pain to get off since the first glitter was soo chunky! I used the foil method to try and take it off but didn't have the patience to wait for it to really work so I had to scrub some to get it all off but oh well. 

Hope everyone has a good Fourth of July and if you don't live in the United States, then I hope you just have a good good in general! 

-Lindsey

Wednesday, June 29, 2011

Glittery Nudes

Hey bloggers!


Here is one of the Love & Beauty polishes from Forever21 that doesn't have a name. I like nudes but sometimes they bore me and since this has glitter in it, it gives it a little something extra. It was more shear that I expected, so instead of my typical two coats I had to go with three. Overall I really liked the color though!


Be on the lookout for a semi 4th of July inspired look! Any big plans besides watching fireworks, cooking out, and slipping into a food-coma?


Hope y'all have had a good week so far!
-Lindsey

Monday, June 27, 2011

Mini Haul

Hi bloggers!


Just wanted to show you a few of the new polishes I've bought over the last month (roughly), nothing too crazy exciting today but keep looking a little later on this week to see how a few of these looked on!


From left to right: Essie Nice is Nice, Essie My Perfect Pair which included Meet Me at Sunset and Smooth Sailing, two Love & Beauty polishes from Forever21 that don't have names, Wet N Wild Fastdry Waves of Enchantment (which I used in my water marble), and Wet N Wild Fastdry Sea of Dreams.  

Question: Would you guys like to see an occasional post on other beauty products besides nail polishes? Make up, face products (washes, lotions, cleansers, etc.), perfumes, other things along those lines? We would still stay a nail polish blog obviously, just something else to mix it up every once in a while. Give us your thoughts please! 

Like I said before, be on the look out the rest of the week for posts featuring a few of those polishes above. 

Hope y'all had a good Monday! 
-Lindsey

Tuesday, June 7, 2011

Glittery Cracked Goodness!

Hi bloggers!

Sorry for the lack of posts the past few days! Brielle and I have both had a pretty busy weekend, as will the next two weekends be for the both of us so bear with us please!

I tried out two of the nail polishes I posted about in my previous haul post. I picked Finger Paints in Laugh My Art Off and Sally Hansen Crackled Overcoat in Fracture Foil. I'm completely in love with glitter polishes and crackle ones as well so I got the best of both worlds with this one!

Close up of the glittery goodness! Excuse the slight messy edges, they weren't cleaned up yet! 


And the last one with the crackle overcoat. I loved, loved, loved how this turned out! To make things even better, it got the stamp of approval from my boyfriend :) he said it looked like I could "shoot lightening bolts out of my nails or something sweet" lol

I really liked the Sally Hansen Crackle Overcoat. After being slightly disappointed in the China Glaze Crackle Glaze and it's crackling ability, I was a little hesitant with this one. OPI's Shattered polishes still rank #1 for me when it comes to crackle polishes I've tried but so far, Sally Hansen is a close second. 

Hope everyone has had a good start to their week!!
-Lindsey