Showing posts with label Sally Hansen. Show all posts

Saturday, May 19, 2012

Hot Apple with gold crackle

Hey Guys!

With the weather getting nicer and nicer I was dying to find the most perfect red/hot pink mix and so I went searching through my stash and I found it with Hot Apple from China Glaze. It was so bright and so perfect for my mood. It was so good, I even put it on my toe nails as well! I also did an accent nail of gold crackle, Antiqued Gold from Sally Hansen.

I'm just getting more and more excited for the warm weather and summer! I hope you guys are too and thanks for taking a look :)
Lindsey

Sunday, April 8, 2012

Easter Nails

Happy Easter everyone!
If you don't celebrate Easter, then happy Sunday! Lots of colors and a franken are coming your way! The base colors I used from left to right are OPI Play in the Peonies, Zoya Catlin, OPI Time-less is More, China Glaze Light as Air, and Sally Hansen  Diamond Strength Diamonds
The colors are in reverse order on my nails and Diamonds was used as a top coat on top of them just to give a similar finish to all of them. I love adding Diamonds on top of colors just to add a little shimmer on top especially if the colors don't have any shimmer in them.
Next comes the polka dots! The colors I used for the polka dots from left to right are China Glaze White on White, Sephora by OPI Blue Grotto, my own glitter franken, and OPI Purple with a Purpose.
My glitter franken was just a bunch of little Bon-Bon polishes mixed together in an empty bottle. It didn't quite turn out how I had hoped it would but I still like how it turned out. Here are on some close ups of it in the bottle and on my nail. 

I hope everyone enjoyed their weekend and are ready for the week ahead!
Lindsey


Tuesday, March 20, 2012

Sally Hansen Salon Effects Real Nail Polish Strips: SPRING FEVER

SPPRRIIINNGGG FEEEVVERRRRR!

Okay ya'll (ps, Adam and I totally want to become Southerners), it is getting warm up in the Midwest and I AM LOVING IT!

2012 has been hard on me because the place I am in life. I know, sob story, I'm in college blah blah blah. But no really, I just feel stuck. I'm ready to get on with life! AH! I seriously have only been doing my nails every other week or so. It's been rough.

So, we took a BREAK! Breaking from the stressors of school, work, teaching, everything. It was a time for us to recharge for these last six weeks of school before the summertime.

We went to Panama City Beach, Florida. IT WAS BEAUTIFUL!


All I can do is sigh. I love the beach, I am totally a child of the sun. SO GORGE! 


Anyways, on to the more important things.... nails. 

A few days before vacation I was really worried about what I would do with my nails, I mean I was NOT going to take polish to PCB with me. In came Sally Hansen's Salon Effects Real Nail Polish Strips. I was walking through MEIJER! And they caught my eye, how perfect for vacation, I thought. Laid down some cash and there I was.

We weren't leaving until Friday at 2am so I had time to quickly slap them on and get in the car for twelve hours. 

This was taken on my balcony, they worked so perfectly, they stayed on for the most part! They are the perfect vacation accessory!

Here's out they looked five days after application... 

Not too shabby considering all the wear and tear they were receiving at the beach!


I hope you all are enjoying the first day of spring and have warm weather!

Brielle

Sunday, December 11, 2011

Big Money

Hi everyone!

Here is just a quick nail of the day look. Browsing through Meijer I saw a display for the Gem Crush line from Sally Hansen and LOVED them all. After looking closer at them and obviously telling myself not to buy all of them, I realized I had similar ones as some of them but I found one that I didn't have one close to at all and that was Big Money, a fine gold glitter with larger light purple glitter. Sooooo pretty!
 And a little closer up just so show the prettiness!
Hope you guys enjoyed!
-Lindsey

Wednesday, December 7, 2011

VitaSurge Growth Gel

Hi bloggers!

As I mentioned in my fall water marble post, my nails haven't been doing too good! Five of them broke all within a few days  of each other so I figured I would give a new growth treatment a go. I grabbed Sally Hansen VitaSurge Growth Gel with micro-encapsulated vitamins. It's a five day treatment for brittle nails that crack and break promising longer, healthy looking nails. Well I had all the best intentions of doing the five days I was suppose to, but I missed two days. I think missing the two days did make a difference but it didn't really affect how much I liked this product. First let's take a look at the bottle and applicator.
So it's green with little blue ball things throughout it. I was a little worried that it would leave my nails a little green but it didn't! I was surprised by the applicator. Instead of it being a brush, it was more like a lip gloss applicator. I thought it was a little strange but it worked well. You just applied it to your nail and massaged it in. It left a nice, natural look to your nails. On the left is my nails without anything before I started, and the right is after day five.


My nails that didn't break, didn't grow very much, but the nails that did break grew a decent amount. My pointer finger and middle ringer on my right hand (the last set of pictures) broke AGAIN during the five days so they didn't really grow at all.

Overall, I liked this product. I wish I would have followed through with the whole five days in order to have gotten better results which was my own fault. Also, the gel itself smells nice. It doesn't have a chemical, nail polish smell to it like a lot of growth treatments do so that was a nice plus. So, if your nails are doing poorly and you have five days to spear, this product is worth taking a looking at!

Be on the look out for some holiday nails soon!
Lindsey

Tuesday, September 20, 2011

Galaxy Nails

Hi bloggers!

I know galaxy nails have been going around for a while now but I just got around to giving them a try. I liked a lot of the pictures I've seen posted online and watched a tutorial on how to do them a while ago and decided to give them a shot finally.

I started off with a black base coat, China Glaze Liquid Leather. Next, I decided some flakes would be a great idea to add some interest to the black so it wasn't just a flat black. I used Hidden Treasure from Sally Hansen, the most beautiful flakes ever.

I used a lot of different colors, probably more than I needed to but oh well. I had fun creating the nebula effect on my nails. I created this by using a wet Q-tip, similar to my glitter gradient post. The colors used in the order they were used from left to right: China Glaze Liquid Leather, Sally Hansen Hidden Treasure, Sephora by OPI Blue Grotto, Zoya Caitlin Love and Beauty Lime, China Glaze Touch of Glamour, Sephora by OPI Wardrobe Change, China Glaze White Cap, and for the stars I used China Glaze White On White.

If I were to do these again, I would definitely want to find a tool to make smaller stars because mine turned out way too big for my liking. Also, I would probably want to use a yellow for my stars instead of white, or maybe mix some yellow and white together to get a good color for the stars because I feel like the white looks a little out of place. You could also just go without the stars at all, I really liked just the nebula look by itself.

Hope you guys enjoyed!
-Lindsey

Tuesday, September 6, 2011

Transitioning Into Fall

Hi bloggers!

If you live in the mid west of the US like Brielle and I do, then you know the seasons are beginning to change weather or not we want them to! So what does this mean for you nails? Of course you can keep them whatever colors you want but I do tend to generally follow the seasons when it comes to my color choices. Around this time of year I start using more reds and darker pinks to ease into fall. This NOFD is Sephora by OPI BYOBoy. I love this color, it's the perfect dark mauvey-pink.


I'm also going to start including some dupes with some of my posts. As my nail polish collection has grown and continues to grow, I've noticed I've gotten more and more dupes without really noticing that I had acquired so many. Some of the colors are from different seasonal collections and some or more permanent colors from different nail polish brands. This group of dupes are obviously reds, another good fall transition color. The colors from left to right: Revlon Valentine, China Glaze Phat Santa, China Glaze Drastic, and Sally Hansen Hollywood Scarlet.

On each finger there are two coats of the color.  As you can tell, they are all pretty similar shades.
Hope you enjoyed!
-Lindsey


Tuesday, August 30, 2011

Fun With Cracks

Hi bloggers!

As I've stated before, I love glitter polishes and I love crackle polishes and the two together is just wonderful but as more and more companies are coming out with crackle/shatter polishes and more and more people are using it, just having a crackle top coat is getting a little boring so I decided to spice it up a bit.

The base coat I used was Sparkle Teal Sunrise by OPI, a absolute beautiful glitter!

Next instead of just covering my whole nail with the crackle polish, I tapped off parts of my nails so I tapped them of diagonally with Fractured Foil Crackle Overcoat by Sally Hansen. I also used Lightning Bolt Crackle by China Glaze on my ring fingers that I tapped off down the middle, so my ring fingers had two different crackles going in two different directions. I wasn't crazy about the color combination once it was on my nails but I think with the right colors it would have turned out a lot better!

Hope you enjoyed!
-Lindsey

Monday, July 18, 2011

Zoya Caitlin

Hi bloggers!


Here is just a quick post of a simple look but I absolutely loved these two together! Zoya Caitlin and Sally Hansen Crackle Overcoat in Antiqued Gold.

I almost always do an accent nail anymore. I just think they make any manicure a little more interesting but aren't always necessary if there is a lot already going on. Like I said, just a simple one today, hope you enjoyed! 

-Lindsey

Thursday, July 14, 2011

HARRY POTTER!

Hey guys, this is just a quick post! The last Harry Potter movie comes out tonight at midnight, and while I'm dragging my less enthused husband to the showing, I HAD to paint my nails!

Lindsey and I are part of the Harry Potter Generation! I can remember reading the first book in fourth grade on Dr. Seuss Day! Crazy! The last book also came out on my 17th birthday! (Which is a very significant birthday in the wizarding world!)

Here are the nails I did! I got the idea from this video! http://www.youtube.com/watch?v=tZLGIeVoATg

I used- OPI's Black Shatter, China Glaze's Passion (the gold), So Easy's Stripe Rite (a striper polish from Sally's), and Sally Hansen's Black Out with Seche Vite top coat!

The P was definitely the hardest to do, but I just did my best, and I think it looks okay!

I hope everyone loves the new and last Harry Potter film and I hope that I don't cry too much as the symbol of my childhood is coming to an end!

For Hogwarts!
Brielle

PS! Make sure you check out our Twitter!

Saturday, July 2, 2011

Semi-inspired 4th of July nails

Hi bloggers!


I did this manicure not thinking about it being a 4th of July look but it kind of turned out that way. I started out with a Love & Beauty polish with super chunky glitter. 
I had planned on only using this glitter but to get as much glitter as I wanted, I would have had to do at least five coats and I just didn't want to take the time to do that so I grabbed a finer glitter polish called Kaleidoscope from Wet N Wild. 
Finally on top of that, I added a crackle. Sally Hansen's Cherry Smash Crackle Overcoat. 

I really liked how this turned out but it was a pain to get off since the first glitter was soo chunky! I used the foil method to try and take it off but didn't have the patience to wait for it to really work so I had to scrub some to get it all off but oh well. 

Hope everyone has a good Fourth of July and if you don't live in the United States, then I hope you just have a good good in general! 

-Lindsey

Monday, June 20, 2011

Water Marble Semi-fail

Hi bloggers! 


So as promised, here is a recent water marble I did tonight. It didn't turn out as I was hoping but I still like it. I've only done a few water marbles before so I'm still learning! The two mistakes I made with this water marble is I should have used a different base color and I should have put more drops in my water to make more rings of the different colors. Things to keep in mind for next time.


Anyway, I used three different colors: Wet n Wild Fastdry in Waves of Enchantment, China Glaze in Coral Star, and Sally Hansen Diamond Strength in Fuchsia Bling Bling. 


I used Waves of Enchantment as a base color, LOVE IT! So pretty and shimmery pinkish coral, perfect for the summer. 


And here are my two favorite nails before the edges were cleaned up. 


Like I said, it didn't turn out awful but it didn't turn out how I was hoping but it's all a learning process. 

If you are wondering how you water marble, type it into youtube and watch a few videos on it. That's how I learned.

Hope you enjoyed!
-Lindsey

Tuesday, June 7, 2011

Glittery Cracked Goodness!

Hi bloggers!

Sorry for the lack of posts the past few days! Brielle and I have both had a pretty busy weekend, as will the next two weekends be for the both of us so bear with us please!

I tried out two of the nail polishes I posted about in my previous haul post. I picked Finger Paints in Laugh My Art Off and Sally Hansen Crackled Overcoat in Fracture Foil. I'm completely in love with glitter polishes and crackle ones as well so I got the best of both worlds with this one!

Close up of the glittery goodness! Excuse the slight messy edges, they weren't cleaned up yet! 


And the last one with the crackle overcoat. I loved, loved, loved how this turned out! To make things even better, it got the stamp of approval from my boyfriend :) he said it looked like I could "shoot lightening bolts out of my nails or something sweet" lol

I really liked the Sally Hansen Crackle Overcoat. After being slightly disappointed in the China Glaze Crackle Glaze and it's crackling ability, I was a little hesitant with this one. OPI's Shattered polishes still rank #1 for me when it comes to crackle polishes I've tried but so far, Sally Hansen is a close second. 

Hope everyone has had a good start to their week!!
-Lindsey

Tuesday, May 31, 2011

Haul Time

Hi Bloggers!


Before I start, let me just say that I didn't not buy all of these in one day! These were bought over the course of around two weeks and I hardly ever buy this much in such a short amount of time! Also, Zoya had a great promo going on that let you get two polishes for free which I took advantage of. Anyway, on with the goodies :)

Top row, left to right: Wet n Wild Wild Shine in Kaleidoscope, Wet n Wild Wild Shine in Hallucinate, NYC In a New York Color Minute Quick Dry in Central Park, Finger Paints in Laugh My Art Off, Sally Hansen Crackle Overcoat in Fractured Foil.


Bottom row: 5 different Bon Bons that don't have names

Top row, left to right: Sally Hansen Crackle Overcoat in Cheery Smash, Sally Hansen Crackle Overcoat in Antiqued Gold, Zoya in Dove, Zoya in Caitlin, Zoya in Colbie

Bottom row: 3 different Sally Girl nail colors that don't have names


I'm so excited to use every single one of these polishes! Some of these I bought to mess around with frankening my own nail polishes. If you don't know what a franken is, it's a nail polish mixed from bits of other nail polishes to make a new color. I still need to order bottles, but I'll be making some of my own creations very soon! I'm already coming up with color combos that I want to try so be on the look out for those in the near future!!

-Lindsey

Saturday, May 28, 2011

Mani Prep

Hi Bloggers!


This post is going to be about my pre-mani routine, what I do to my nails and what products I use on them before I paint them. It's rather self explanatory for the most part.


After I take off my polish, I either will trim my nails or file them if my nails need shorted or reshaped. After that I will buff them so my nails don't have any ridges, once again, only if needed. After that I will wash and dry my hands to get any nail polish remover or dusty nail particles from filing and buffing off.


Once my nails are reshaped, I put a few products on them. First product is the Sally Hansen Grow Nails Now! which I talked about in my previous post. After that has dried I put on either ORLY's Nail Defense or Sephora by OPI's strengthener. I switch between these products but both of them do the same job, they are meant to help strengthen your nails. The last product I use before my actual nail polish is Nail Life Gripper. This product is a basecoat that helps the nail polish grip to your nail and stay on better and longer.


I realize for some people this might be overkill, but it's what I do and it helps my nails stay healthier and my nail polish stay on longer. After the Nail Life Gripper dries it's time to paint your nails with a lovely color and then use a good clear top coat and you're good to go! I found a diagram online that shows the basics of applying your nailpolish but I couldn't find the original source (if anyone happens to know the source, or if you are the source, please let me know and credit will be given!). You might think this is dumb, but I'm going to post it anyway because it could help someone out! 

Edit: This helpful diagram is from http://www.lacquerized.com/2010/05/how-to-how-i-paint-my-nails.html 


The text is a little small so here is what it says: 

1. Start off with a clean nail, make sure the surface is nail polish and oil free. 
2. Apply your base coat or ridge filler. This prevents staining and chipping. Let it dry.
3. Place a drop of polish in the center of the nail, a bit above the cuticle. 
4. Carefully push the drop towards the cuticle, leaving just a small gap. 
5. Now move your brush upwards making a straight line till the end of the nail. 
6. Go back to the base of the nail and swipe the polish along the curve of the nail. 
7. Keep dragging until the whole side of the nail is covered. 
8. Repeat step 6, but do this on the other side of the nail. 
9. Repeat step 7, but do this on the other side of the nail. 
10. If necessary apply a 2nd or 3rd coat. Finish with a (quick drying) top coat. 

Hope this was helpful and Happy Memorial Day weekend everyone!! 

Lindsey

Wednesday, May 25, 2011

Grow Baby, Grow!

Hi Bloggers!


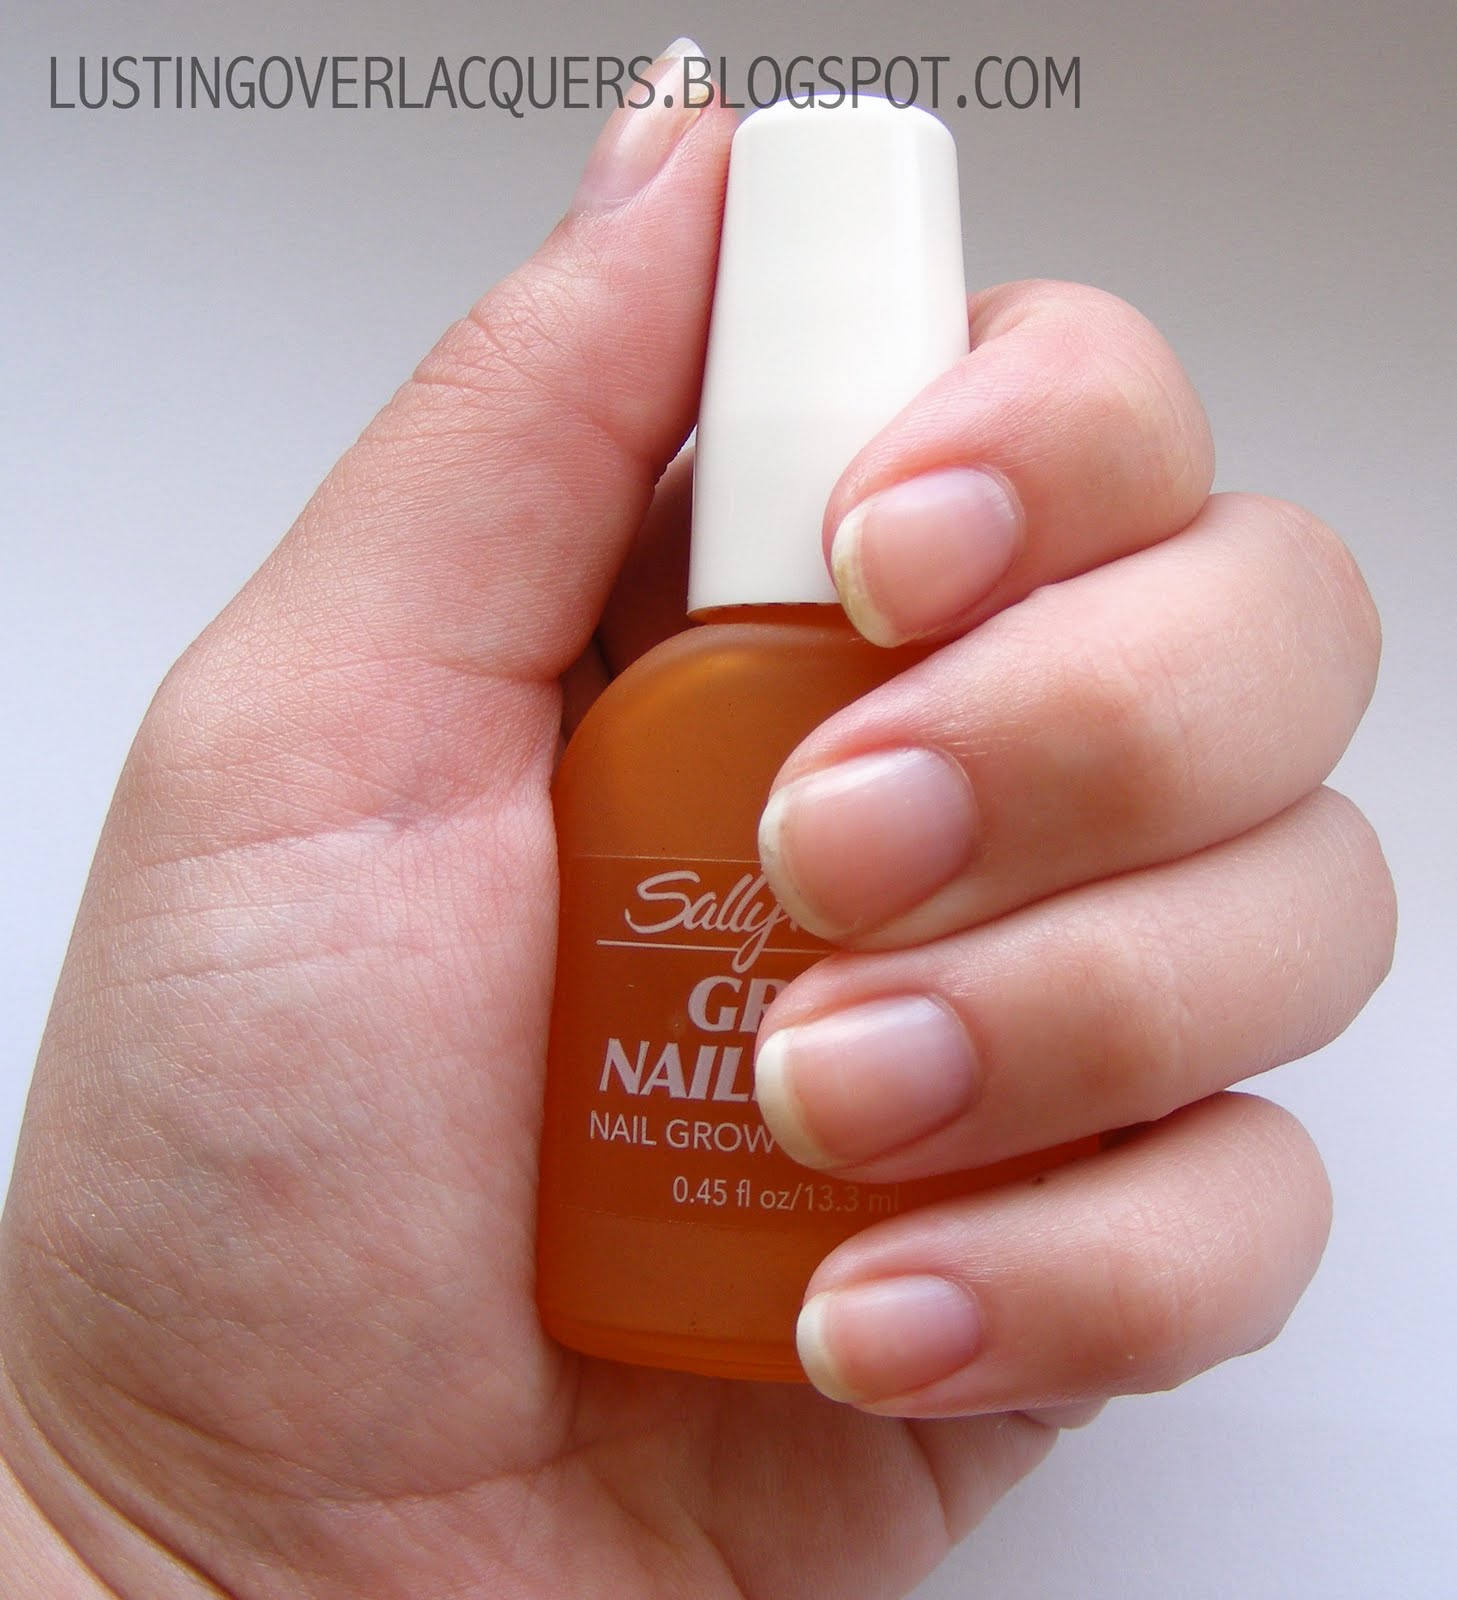
So I know Brielle and I both suffer with nails that tend to break easily and that peel and I'm sure some of you probably do too. Neither of which are fun to deal with. I decided to use a product that I've had and used before but didn't give it a real good trial to see if there was any benefit to using it. The product is Grown Nails Now! by Sally Hansen. In the picture below my nails are bare, just filed and freshly buffed.

The directions on the back of the bottle say: Brush generously over nails and cuticlues; gently massage in. Let nails dry before applying nail enamel, or wear alone for a natural look, so that was exactly what I did!

I did this for seven days. I haven't gone that long without putting on polish in a long time. As you can see there was a good amount of growth during the week, although it is hard to know how much my nails would have grown naturally without this product. Right now, I'm dying to paint my nails so going another week without putting anything on them might kill me. Okay, over exaggeration but still! My nails did grow and they did feel stronger than the normally do so there was a difference while using this Sally Hansen product.

 I will probably be putting this product in my pre-mani routine, which I will be blogging soon to show you all! I also plan on trying out some other growth products in the future because after all, who wouldn't want longer, stronger nails?


-Lindsey